Sunday, December 30, 2012

The Humble Cracker – December 30, 2012


We had a fabulous event to raise money for The Coalition for the Homeless last week.  It is my husband’s brain child and involves great local music and delicious local soups.  The soups all sold out in record time, but we were left with lots of condiments including bags of shredded cheese and oyster crackers.  I have to say that oyster crackers are not something I usually buy or think about, but here was my excuse to give them a try.  Since we were headed to a week hanging out with family, I first tried making them into a snack.  The Ranch Crackers were easy to make and even easier to toss out as a snack while opening presents and hanging out with family.


Ranch Oyster Crackers

¾ c. vegetable oil
1 pkg. Ranch dressing mix
¼ tsp. lemon pepper
½ tsp. dill weed
¼ tsp. garlic powder
12-16 oz. oyster crackers

Mix oil and other spices.  Toss in crackers to fully coat.  Place in oven for 15-20 minutes at 250 degrees.  They stay well for over a week in an air-tight container.

I also decided I'd like to try some other seasoning mixes.  First, I tried adding 2-3 T. sweet curry powder to the oil.  Then, I tried 3 T. Penzy's Country French Vinaigrette and 1/2 tsp. garlic powder with the oil for a third round.  The curry was not so good, but the Vinaigrette was great.


But, oyster crackers are also a great excuse to make a hearty soup and our snow covered neighborhood set just the right mood.  So, I went all out and got oysters at our local seafood market and made oyster stew.  This recipe is adapted from one Mark Williams shared at a cooking class he does at Yew Dell Gardens.  It is so rich and warm and yummy, I recommend you give it a try.

Heritage Oyster Stew

5 T. butter
1 pint oysters with their liquor, jarred or freshly shucked, about 2 dozen
1/4 cup flour
1 medium yellow or white onion, minced
1 1/2 cup milk
1/2 cup cream
Splash of hot sauce
Salt
Freshly ground black pepper
1/2 cup parsley, minced

Strain the oyster juice through a fine-meshed sieve into a bowl to remove any grit, reserving the juices. Rinse the oysters well.  Melt the butter in a pot over medium heat. Add the flour and stir to make a roux.  Reduce the heat to medium-low and cook the mixture for a few minutes, stirring often. When the roux darkens, stir in the onions. Increase the heat to medium and cook for 2-3 minutes, stirring frequently.

Add the oyster juice and any juices the oysters have released. The flour in the roux will absorb the liquid and turn into a paste. Slowly add the milk and cream, stirring to incorporate as you pour them in. Add a healthy splash or two of hot sauce, to taste. Heat the soup to steamy, but below a simmer, over low heat for 15 minutes; do not boil.

Add the oysters and cook for another 2 minutes, or until the edges of the oysters just begin to curl.  Add salt and freshly ground black pepper to taste. Garnish with fresh chopped parsley and oyster crackers!


Sunday, December 23, 2012

Christmas Gifts – December 23, 2012


All the canning I did through the year is really paying off.  We made lots of holiday baskets for our friends, co-workers and neighbors.  Each is filled with one of my canned goods as a gift of warmth and home.  We also included John’s famous chocolate toffee to bring sweetness in the coming year and spiced nuts or jam cakes to bring a little spice.  Finally, we included a lottery ticket to bring luck in 2013.  (For our out of state friends and relatives, we also added a mini bottle of bourbon to add a bit of Kentucky.)


We decided to make the jam cakes this year because not only are they traditional to Kentucky, but they have a great holiday spice flavor and they are a great way to use up both the applesauce I made earlier in the year and berry jam.  There are many recipes, some including caramel icing, but this one is really rich and yummy and can be made any type of jam.  Traditionally, you would make as a large cake, but I made mini bundts and loaves to share.


Jam Cakes

1 c. sugar
½ c. shortening
1 egg
1 ½ c. applesauce
1 c. berry jam (I used blueberry, but blackberry is the most traditional)
2 tsp. soda
2 c. flour
½ tsp. salt
2 tsp. cocoa
½ tsp. nutmeg
½ tsp. cloves
1 tsp. cinnamon
1 c. raisins
1 c. nuts (optional, but I used walnuts harvested from our property)

Preheat oven to 325 degrees.  Cream sugar and shortening.  Add egg and mix in.  Sift flour, salt, cocoa and spices together.  Add soda to applesauce and jam.  Mix well.  Combine the three mixtures in one large pan and mix well.  Add raisins and nuts.  Pour into greased pans.  Bake up to an hour for a large bundt or as little as 30 minutes for small bundts.


OK, we buy every item to make toffee, so there is no using what you have here unless you own a cow that provides you with lots of milk for butter.  But, everyone requests the toffee each year, so it’s always included in our gift bags.  It’s also really easy, so I suggest adding it to your gift bags as well.


 Chocolate Toffee

2 sticks butter
1 c. sugar
1 c. slivered almonds (you can leave this out for those with nut allergies)
1 T. light corn syrup
1 T. water
1 11.5 oz. bag milk chocolate chips (you can use semi sweet if you prefer)

Add all ingredients except chocolate in a heavy pan on stove and heat (stirring constantly) for approximately 8 minutes.  OK, this is the only difficult part of this recipe, but after you make it a couple times you’ll get your own feel for it.  The toffee when ready will take on a color about the shade of brown sugar; you’ll start to smell a change and see a bit of smoke.  Quickly pour this onto a cookie sheet already on your counter and spread evenly.  Pour the chocolate chips on top and let sit for a minute.  Now, spread the chocolate on top of the toffee and place in the fridge for an hour.  Break and eat.  

Happy Holidays All!

Friday, December 7, 2012

Apple Cider, Yum - December 7, 2012

During the Thanksgiving Holiday we took advantage of the opportunity to buy local apple cider for sale in all the markets.  We drank some cold and some hot, but the rest I used for cooking.  I actually made two recipes with the cider, but one was much more successful than the other.


I am sure you have all heard the excitement surrounding the Smitten Kitchen and her new cookbook.  I heard her interviewed on Diane Rehm and was surprised to hear her say that her favorite recipe in the new book and on her blog was apple cider caramels.  It sounded like a great idea, so I gave it a try.  I was surprised that even though I didn’t have a candy thermometer on vacation, the caramels were the perfect consistency especially as they sat or if they were kept in the fridge.  There was just one problem.  The recipe had way too much salt for me.  So here is that recipe with less salt and I hope it works for you:


Apple Cider Caramels
4 c. apple cider
1/2 tsp. ground cinnamon
1 tsp. sea salt
8 T. unsalted butter, cut into chunks
1 c. sugar
1/2 c. packed light brown sugar
1/3 c. heavy cream
Vegetable oil for the knife

Boil the apple cider in a 4-quart saucepan over high heat until it is reduced to a dark, thick syrup, between 1/3 and 1/2 cup in volume. This takes about 35 to 40 minutes. Stir occasionally.
Meanwhile, get your other ingredients in order:  Line the bottom and sides of an 8-inch straight-sided square metal baking pan with 2 long sheets of crisscrossed parchment. Set it aside. Stir the cinnamon and salt together in a small dish.

Once you are finished reducing the apple cider, remove it from the heat and stir in the butter, sugars, and heavy cream. Return the pot to medium-high heat with a candy thermometer attached to the side, and let it boil until the thermometer reads 252 degrees, or about 5 minutes. Keep a close eye on it.

Immediately remove caramel from heat, add the cinnamon-salt mixture, and give the caramel several stirs to distribute it evenly. Pour caramel into the prepared pan. Let it sit until cool and firm—about 2 hours, though it goes faster in the fridge. Once caramel is firm, use your parchment paper sling to transfer the block to a cutting board. Use a well- oiled knife, oiling it after each cut, to cut the caramel into 1-by-1-inch squares. Wrap each one in a 4-inch square of waxed paper, twisting the sides to close. Caramels will be somewhat on the soft side at room temperature, and chewy/firm from the fridge.


I had much more success with pumpkin butter.  I bought a cute little pumpkin left at the market after everyone was finished buying their pie pumpkins.  It, the cider and a blender were the keys to a great breakfast spread that our family shared all through the Thanksgiving holidays on English muffins and biscuits.  It would also make a great a holiday gift, but I don’t think it will can due to the fat content, so you need to make about a week ahead and tell the givee that it should be kept in the fridge and used soon.


Pumpkin Butter - 3.5 cups

4 – 4 1/2 cups fresh pumpkin puree (made from small sugar pumpkin)
1/4 c. sweet apple cider
1 c. brown sugar
3-4 tbsp pure maple syrup, to taste
1 T. ground cinnamon
1/2 tsp. ground nutmeg
1 tsp. fresh lemon juice
1 tsp. pure vanilla extract
Pinch of fine grain sea salt

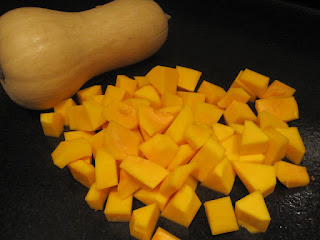
Peel and cut pumpkin in 1 inch cubes.  Save seeds to roast and boil pumpkin until soft. Cool and add pumpkin flesh to a blender. Add cider and blend until smooth, stopping to push down the pumpkin when necessary.  Add the brown sugar, maple syrup, cinnamon and nutmeg.  Process again until super smooth and no clumps remain.

Spoon mixture into a medium-sized pot. Cover with lid and prop lid ajar with a wooden spoon. Over medium-high heat, bring mixture to a low boil. Reduce heat to low-medium and cook for about 10 minutes, or until it’s as thick as you want it.  Remove from heat and stir in vanilla.

Cool completely, stir in lemon juice and a pinch of salt, and then store in a sealed jar in the fridge.  It should keep for 2-4 weeks.

Friday, November 30, 2012

John's Thanksgiving Dressing - November 30, 2012


Well, I had to focus on the turkey and carcass last week as it is the true center of the Thanksgiving holiday, but many others are much more focused on the carbs.  One holiday carb that requires leftovers is dressing.  There are many types of dressing from cornbread to oyster to rice.  But, for the past several years, my husband John has focused on a rich sweet and savory sourdough dressing that requires day old sourdough bread.  This dressing which originally came from Bon Appetit with a few tweeks from the Harris’ is so complex in flavors and ingredients that you could eat it as a meal, but my husband informs me that the strength of dressing is its ability to take turkey and gravy to another level.  I'll let you decide about that.


If you are considering making this dressing, you'll need to set aside a bit of time or recruit a few willing family members.  It requires a great deal of slicing.

Sourdough Dressing with Sausage, Apples and Golden Raisins

1 1/2-pound loaf sourdough bread, crusts removed, bread cut into 1/2-inch cubes
2 pounds bulk chorizo sausage (we have a local farmer that produces this, but you want spicy sausage)
2 large onions, chopped
5 stalks finely chopped celery (if you must)
4 tablespoons (1/2 stick) butter, divided
6 cups peeled and finely chopped Granny Smith apples
3/4 cup golden raisins
2 tablespoons chopped fresh sage
2 1/2 cups low-salt chicken broth
3 large eggs

Position rack in center of oven and preheat to 350°.  Spread bread cubes in single layer on baking sheet and bake until golden, stirring occasionally, 15 to 20 minutes. Transfer bread to very large bowl.

Sauté sausage in heavy skillet over medium-high heat until cooked through, breaking up into small pieces with fork, 8 to 10 minutes.  Using slotted spoon, transfer sausage to bowl with bread cubes.  Add onions and celery to drippings and sauté until golden brown, about 12 minutes.  Transfer to bowl with bread-sausage mixture (do not clean skillet).

Melt 2 T. butter in same skillet over medium-high heat.  Add apples and sauté until tender, about 10 minutes.  Add to bowl with bread mixture and mix in raisins.

Melt remaining 2 T. butter in same skillet over low heat.  Add 2 T. sage and stir 30 seconds.  Add sage butter to bowl with bread-sausage mixture and toss to blend.   Season stuffing with salt and black pepper.  This can be done ahead and kept covered in refrigerator over night.

Generously butter 15x10x2-inch glass baking dish (ours actually took two).  Whisk broth and eggs in medium bowl and add to stuffing, tossing to mix.  Transfer to prepared baking dishes).  Bake stuffing uncovered until top is golden and crisp in spots, 45 minutes to 1 hour.  Let stand 10 to 15 minutes and serve.


Sunday, November 25, 2012

Let’s Talk Turkey – November 25, 2012


My husband, mother-in-law and I traveled to Tennessee with a 23 pound locally raised turkey for the holidays.  It was juicy and delicious but cooked much faster than the recipes for bloated grocery turkeys that are basted every 30 minutes said it would.  And, the seven of us present ate it for days and still had left overs.  Most of the left overs were eaten as on Thanksgiving Day with dressing and gravy, but we also had sandwiches and my relatives left with stories of turkey tetrazzini and hash in their future.


The last Thanksgiving I had left overs, I made a great pot pie, but this year, I took home the turkey carcass, not the meat.  I decided this was the perfect opportunity for a turkey soup or stew.  What I made turned out to be something in between.  You could add a little more water to make it more soupy or less to create a thick stew.  I only had a few things in the pantry and fridge after being gone from home a week, so I made do with what I had.  I thought the results were delicious:


 Post-Thanksgiving Turkey Stew

1 turkey carcass
½ chopped onion
3 bay leaves
2 crushed cloves garlic
1 T. Penzy’s Ruth Ann’s Muskego Seasoning (or other seasoning of choice)
¼ - ½ tsp. cayenne
½- 1 can tomato paste
1 can garbanzo beans with the liquid
4 cups chicken broth
3 cups water
2 c. frozen corn (hopefully you put some up during the summer)
1 c. dehydrated tomatoes (I put these up from cherry tomatoes, but you could use frozen or canned tomatoes.  It’ll just have less punch)
1 c. macaroni (I used Barilla Piccolini made with carrots and squash)

Add all ingredients except the macaroni to a large pot and bring to boil.  Let simmer 20 minutes and remove the carcass.  Once cooled, remove any remaining meat and toss back into pot, tossing the bones and bay leaves.  Add macaroni and bring back to boil.  Cook as directed for pasta.  Serve.


So, if that just isn’t to your liking after Thanksgiving and you want something more exotic or warm and easy to digest, Jook is the answer for both.  This porridge like Chinese soup goes down easy, especially with the addition of ginger which is said to settle a stomach ache.

Turkey Jook

1 c. long-grain white rice
6 scallions
1 turkey carcass
1 4 inch piece ginger, peeled and chopped
10 c. water

Simmer rice, 3 scallions, carcass, half the ginger and water in large covered pot until it becomes creamy (about 1 hour).  Discard turkey bones and large pieces of scallion and ginger.  Serve sprinkled with remaining ginger and scallions finely chopped.

Whatever you do with the turkey carcass and other left overs, I hope you had a wonderful and warm holiday with those you love!  Happy Thanksgiving!

Saturday, November 17, 2012

Bringing in the Herbs – November 17, 2012


We are headed off for a week out of town.  We’ll be away from work and house projects (although I’ve packed a blender to make pumpkin butter and plan to have a great resulting blog) so the raking won’t happen for another week.  The one project did take a few minutes to perform though, was bringing in the herbs.

I would love to grow more herbs, especially dill, so that will be a project for the Spring.  For now, we just have Lavender, Rosemary, Chives, Mint, Oregano and Basil.  I don’t do anything for the first three.  I use them as I like during the summer and then let die during the winter and wait for them to come back.  My response to Mint and Oregano is similar, but I want to save some of those herbs to have through the winter.  You can find lots of recipes for blending these herbs (as well as others) into a paste and freezing in ice cube trays.  I find that to be alt to work and to take away a good deal of the flavor of the herbs due to all that crushing.  Instead, I just pick all the healthy leaves I can find before the first big freeze, wash and air dry them and then stack in a zip lock bag with a label in the freezer.  I can just pull out the bag and remove as many leaves as I need for a recipe.


The hardest is the Basil.  Basil is not meant to winter through in Kentucky, but I have started to make it a winter house plant.  I cut the plant back to the first set of leaves and pot it and bring it in.  It doesn’t look great most of the winter, but for the last five years, it has come back better each year in the Spring.  I’m sure you could do this with other woody stemmed herbs as well.


I hope you all have a wonderful Thanksgiving meal with lots of lovely fresh herbs.  We are traveling with a 23 pound locally raised turkey that is sure to end as a great story and I am making the Brussels Sprout’s from a previous blog.  Whatever you have, enjoy!

Saturday, November 10, 2012

Lettuce Clean Out the Fridge - November 10, 2012


In our house salad is the perfect solution for left overs.  Lettuce is plentiful in the Spring and Fall and Greens last even longer.  I wash a new batch of greens and have ready in the fridge during the week to make salads as needed.  But, salad can be made throughout the year without lettuces.  I've already blogged about rice salad and everyone knows such famous lettuce free salads as Caprese or Orange Salad.

A perfect example of salad as a way to clean out your fridge is Nicoise.  While, it is expensive for me to get the basic ingredients for this fabulous salad filled with fresh grilled tuna, olives, French green beans, potatoes and capers; this is exactly what is available in abundance in the Nicoise region of France.  So, I looked around to see what I had to make a great salad this week.  It all started with my cleaned lettuce and some great Brussels sprouts that had come in our farmer's box.  Here is the simple recipe for them:

Brussels Sprouts

6 slices bacon, chopped
1/2 c. sliced shallots
1 1/2 lb. Brussels sprouts, halved
6 sliced garlic cloves
1/2 c. chicken broth
1/4 c. white wine
1/8 tsp. salt
1/8 tsp. pepper

Heat skillet over medium-high.  Saute bacon for 5 minutes until brown and remove pan from heat.  Add in Brussels sprouts and shallots and saute 4 minutes.  Add garlic and saute 4 minutes.  Add broth and wine and bring to boil.  Cook 2 minutes until sprouts are crisp tender.  Season.


Along with these beautiful sprouts and lettuces, I added carrots, olives and homemade croutons.  A little goat cheese and Balsamic vinegar finished it off for a perfect lunch. 

One last pointer about making great salads is that it helps to have some go to staples in addition to lettuce readily available.  We always have some dried fruit (especially cranberries), nuts and cheese.  These are fabulous together in a salad.  Capers, olives, croutons, sesame sticks and garbanzo beans also keep well and are great to pull out for a last minute salad.  Anyone else have favorite salad recipes or staples?

Friday, November 2, 2012

Pumpkin Day – November 2, 2012


My all time favorite holiday is pumpkin day.  Okay, most of you have never heard of pumpkin day and there are no greetings cards for it.  This explains why it is such a joy!  Once a year, I enjoy spending the day with those I love outside in Fall weather.  The day must involve turning trees and the purchase of a pumpkin but everything else including fresh donuts, apple cider, hayrides, corn mazes, ornamental gourds and corn are optional. 

This year we headed out to Fox Hollow’s Fall Festival and it was a big event.  There was lots for kids to do including pony rides and a giant hay castle.  There was live music and local food and thanks to getting lost on the way due to an interstate closure, we saw lots of turning trees.  We also got our annual pumpkin.

Now, here is where I have to confess that I had picked out the next two recipes for using up a pumpkin after it has served as Halloween decoration, but before I could do so, the squirrels, gnawed through the top of our pumpkin and ate the whole thing top down.  But, I was not to be deterred.  I went ahead with my original recipes and just adapted with what I had from our weekly farmer’s box.  I was really surprised to find that the roasted pumpkin seed recipe is just as good, if not better with winter squash seeds.  I used the seeds from a large butternut squash.


Toasted Pumpkin or Winter Squash Seeds

1 cup seeds
1 T. olive oil
½-1 tsp. salt

Wash and remove the squash from seeds.  Lay out on tray to dry.  Preheat oven to 275 degrees.  When ready to toast, place tray in oven just long enough to fully dry.  Remove and toss seeds in a bowl with oil and salt to coat well.  Cover baking sheet with foil and return seeds, spreading evenly.  Toast for 15 minutes or until seeds start to pop.  These are great on a salad or just as a snack with wine as we had them above.

Pumpkin-Ricotta Stuffed Shells

24 jumbo pasta shells (I actually used lasagna noodles and just rolled them up around the stuffing)
1 T. olive oil
2 ½ c. fat-free ricotta (I used the new Philly cheese fillings)
15 oz. pumpkin puree (thanks to the squirrels, I used sweet potato puree)
¾ c. plus 2 T. grated Romano
1 large egg white
2 minced garlic cloves
1 c. chopped basil
26 oz. tomato sauce (I used a jar of the spaghetti sauce I put up in the blog months ago, but store bought is fine)

Cook pasta and drain.  Drizzle with oil and set aside.  Stir together ricotta, pumpkin, squash or sweet potato, ¾ c. Romano, egg white, garlic and basil.  If you just used regular Ricotta also add salt and pepper to taste. 

Preheat oven to 350 degrees.  Spread sauce in bottom of 9 x 13 baking dish.  Fill each pasta shell with stuffing and arrange in pan.  Cover pan with foil and bake 30 minutes.  Remove foil and sprinkle with remaining ricotta and bake 15 minutes more.  (You can also make and stuff the shells the night before and bake the next day.)

Friday, October 26, 2012

The Great White Sweet Potato - October 26, 2012


We were at the farmer's market at the end of the season and I saw something I'd never seen before - white sweet potatoes.  I just had to try it especially since my wonderful brother-in-law has decided to start eating sweet potatoes versus Russets because they are better for him.  It turns out these might be a good choice for him.  They have the consistency of a sweet potato but are more starchy, less sweet than the traditional sweet potato.

Because Wilson had decided to eat them for their health features, I looked up sweet potatoes and it turns out, they are great for you.  A 4-ounce serving of sweet potato (about 1/2 cup) provides 390% of your daily need for vitamin A, 40% vitamin C, 18% of fiber and 13% of potassium.  It also has vitamin E, iron, and magnesium and beta carotene. 


They are also easy to put up for the winter months.  Cured potatoes will keep for four to six months.  Once you dig the potatoes (or get them at the farmer's market), store them in a warm humid room for five to ten days. The temperature in the room should be about 80 to 85 degrees and about 80 to 90 percent humidity.  An area near the furnace that is warm or a spot in a large bathroom with a warm temperature is ideal.  If you have an area that's moist but only 75 to 80 degrees, cure the potatoes eight to ten days.  For temperatures ranging At 70 degrees, you'll need to wait at least 25 to 30 days.  Don't cure too long, however, since it causes the potatoes to sprout.  Once you cure your potatoes, store them in a cool place with adequate humidity like a basement or cellar.  A refrigerator is too cold. 

It turns out, I actually prefer the regular sweet potato and rather than curing, I just bake the potatoes until soft at 350 degrees in the oven.  When they cool, I scoop out the warm meat, mash and freeze in plastic containers.  This can be kept for up to a year.  I just take one to lunch and add a little Splenda.  If you're smart enough to store in one cup sizes, you can pull out what you need for a particular recipe.  Here is a great healthy example to start your day:


Sweet Potato Whole Grain Muffins

2 ½ c. whole wheat flour
¾ c. sugar
2 tsp. baking powder
1 tsp. ground ginger
¼ tsp. baking soda
¼ tsp. salt
¼ c. melted butter
¼ c. vegetable oil
1 c. cooked mashed sweet potato
1 beaten egg
½ c. buttermilk

Bake sweet potatoes until soft (about an hour).  Cool and scoop from skins and mash.  Preheat oven to 375 degrees.  Grease 12 -16 muffin tins or fill with paper liners.  Combine dry ingredients.  Combine wet ingredients.  Mix the two only until fully combined.  Fill cups ¾ full and bake 20 -25 minutes.


Sunday, October 21, 2012

Winter Squash Season – October 21, 2012


Autumn has finally arrived in Louisville.  I took a drive on Friday in Southern Indiana and the trees were awe inspiring.  Our closest farmer’s market is closed for the year, but there is still one open all year on Bardstown Road and we get a farmer’s box every other week.  Right now, it is full of local greens and squash and everywhere I drive I see the most beautiful and unusual winter squash.  There are many ways to use winter squash, but my favorite for ease and taste is this chicken and squash curry that makes a great one pot meal for cool evenings.


Winter Squash with Chicken

1 T. olive oil
1/3 lb. ground chicken
1 – 1 ½ c. boiled and mashed butternut squash
1 – 2 tsp. sweet curry powder
½ tsp. cumin
¼ tsp. paprika
pinch red pepper flakes

Heat oil in pan and brown ground chicken, add squash and herbs and mix well.  Serve warm.  You can also make this without the chicken if using as a side dish.

Once you get tired of this recipe and all the great ways to roast and bake squash (plus make fabulous soups) you can move to desserts.  Winter squash makes a great pie (just like pumpkin) but I had to try these cheesecake squares when I saw the recipe at the Bardstown Road Farmer’s Market.  We took them to our community garden harvest festival.

Winter Squash Cheesecake Bars 

9 Graham Crackers  
1/2 c. Old Fashion Rolled Oats
2 T. plus 1/2 cup Sugar (Divided)
1/4 Cup plus 3 T. All Purpose Flour (Divided)
2 T. unsalted butter
3 T. Milk
8 Ounces Reduced Fat Cream Cheese - at room temperature
8 Ounces Nonfat Cream Cheese - at room temperature
1/2 cup Squash Puree
2 Large Eggs
1 tsp. Vanilla
1/2 tsp. Cinnamon
1/4 tsp. Salt

Preheat oven to 350 degrees.  Coat 9 X 13 baking pan with cooking spray.  Process crackers, oats, 2 T. sugar, 1/4 cup flour and butter in food processor until finely ground.  Add milk, pulse until completely moistened. Transfer this mixture into prepared pan and evenly pat into bottom.  Bake 10 minutes.  Cool on wire rack 20 min.

Meanwhile, reduce oven temperature to 325 degrees.  Beat both cream cheeses and the remaining 1/2 cup sugar in large bowl with electric mixer at medium speed until creamy, scraping bowl often.  Beat in the squash puree.  Beat in eggs one at a time.  Finally, beat in the vanilla, cinnamon, salt and remaining 3 T. flour.  Scrape the filling into pan, spreading evenly over crust.

Bake until set and the edges are light brown, about 35 minutes.  Let cool completely on wire rack.  Refrigerate one hour before cutting into bars.

These were good, but not quite sweet enough for me.  We served them dusted with power sugar.  They’d be great with cherry filling on top although you’d lose the subtle squash taste.  You could probably also just add another ½ cup sugar to the filling.

Saturday, October 13, 2012

It's Not Easy Being Green (Tomatoes) – October 13, 2012


It is that time of year.  Fall is in the air and I am rooting for the last of the tomatoes.  We had a fabulous tomato year with many cans put away for winter cooking, but I always hate to know it will be many cold months before I’ll taste another vine ripe tomato. 

The most important thing to do this time of year is to make sure you saved one of the best, ripest, biggest, sweetest tomatoes from this year’s crop to save the seeds for next year.  Just scrape out the seeds into a zip lock bag and fill with water.  You can still use the rest of the tomato to eat.  Let the bag sit several days until it gets a bit funky (this bacteria helps the seed to germinate for next year).  Then drain the liquid and place the seeds on a white piece of copy paper to dry.  Store the dried seeds in an envelope in your fridge or another cool dry place.


 Now, you can begin, like us, to worry about all your green tomatoes that could freeze any day.  We have several huge Vincen Watts tomatoes that we have left in hopes that they will turn red.  We picked many of the smaller ones and put them in a brown paper bag to turn. 


If you like fried green tomatoes or green tomato pie, now is the time to take advantage of these beautiful green beauties before they freeze.  Instead, I use all the small green tomatoes with no chance to turn for making green tomato relish.  This recipe that I make yearly and use in soup beans, stuffed meatless peppers, chicken and other salads makes 6 quart and 7 half quart jars.


 Green Tomato Relish

12 bell peppers
10 onions
4 quarts green tomatoes
1/2 c. salt
6 ¾ c. sugar
2 T. celery seed
2 T. mustard seed
4 c. cider vinegar

Grind vegetables with salt (in blender or food processor).  Let sit overnight and drain out liquid.  Mix vegetables with remaining ingredients and boil over medium heat in heavy pan for 20 minutes.  Pour into sterilized jars leaving ½ inch on top.  Place lids on each jar and cover in boiling water for 10 minutes to seal.


Friday, October 5, 2012

Cheese Rinds and Wax – October 5, 2012


I was in Lotsa Pasta a great local specialty foods store last week and was ordering at the deli counter.  While waiting, I noticed they had a basket that said free, please only two per person.  I looked to see that it was big chunks of Parmesan cheese rinds that they had cut off when cutting the cheese into smaller sections to sell.  I had often heard of saving these rinds to make soup, so I thought this was a great way to give something new a try and use up my own cheese rinds in the future.  I decided to make a minestrone and I started with a recipe from Food Network but adapted to my tastes.  The cheese really thickened things up, actually to the point that this might be classified more as a stew than a soup.  Either way, it was quite yummy.


Minestrone Stew

2 tablespoons olive oil
1 onion, chopped
2 carrots, peeled, chopped
2 ounces pancetta or prosciutto, coarsely chopped (you could leave out and add a bit more oil)
2 garlic cloves, minced
1 russet potato, peeled, cubed
1 (14 1/2-ounce) can diced tomatoes
1 tsp. Italian seasoning
1 (15-ounce) can cannellini beans, drained, rinsed
2 (14-ounce) cans low-sodium chicken broth
1 ounce piece Parmesan cheese rind
2/3 lb. ground chicken, browned (you could leave this out)
1 c. macaroni, cooked
2 tablespoons chopped fresh Italian parsley leaves
Salt and pepper

Heat the oil in a heavy large pot over medium heat. Add the onion, carrots, ham and garlic.  Saute until the onion is translucent, about 10 minutes.  Add the potato; saute for 2 minutes.  Add the tomatoes and seasoning.  Simmer until the tomatoes break down, about 10 minutes.

Meanwhile, blend 3/4 cup of the beans with 1/4 cup of the broth in a processor until almost smooth.  Add the pureed bean mixture, remaining broth, and Parmesan cheese rind to the vegetable mixture.  Simmer until the potato pieces are tender, stirring occasionally, about 15 minutes.  Stir in the whole beans, pasta, chicken and parsley. Simmer until the beans are heated through and the soup is thick, about 2 minutes.  Season with salt and pepper, to taste.  Discard Parmesan rind.  Ladle the soup into bowls and serve.

I found many other soup recipes using the rind, so I’ll have to give them a try as well next time I’m in the store.  Leek and potato sounded especially good.

While it is a different type of cheese rind, if you go back to my blog about mushroom growing, you’ll see that I also found a use for the food grade wax on some cheeses like cheddar.  You can melt it and use to cover your mushroom holes or any other place you need food grade wax.

Sunday, September 30, 2012

Omelets and Frittatas - September 30, 2012

We get a dozen local farm eggs every other week in our farm box, but our friends Lynn and Kim who live in Nashville only have to walk in their back yard for eggs because they have four yard birds!  When they came to visit, they brought us a dozen beautifully colored eggs which we fried and poached for breakfast.  And they were delicious.  It got me thinking about the fact that those with chickens do have to think about using them up or finding ways to share or sell.  But, for me, eggs cooked as omelets and frittatas are also a great way to clean out the fridge.  You don't need a great amount of any one thing to make a great omelette, so it is a great solution when there are lots of little left overs in your fridge but not enough of anything to make a meal.



As you can see from my bowl, I had the last of the garden cherry tomatoes, a red pepper, a jar of olives, a small piece of cheese, some pepperoni, and some wilting parsley.  There was also a small bit of salsa and sour cream.  So, I started by sauteing everything except the salsa, cheese and sour cream in a small skillet with olive oil.  Once the juices were cooked out and everything started to brown, I cracked two eggs over it and as the eggs cooked, lifted the sides so the uncooked egg could continue to run to the bottom and cook.   


Once the omelet was mostly cooked, I crumbled the cheese on top and flipped the omelet over to hold the cheese.  This would all have been much prettier if I was willing to make a three egg omelet so it would fill the pan and make a perfect half circle.  I topped my omelet with the sour cream and salsa.  It wasn't the prettiest, but it tasted great.


Frittatas can also be used the same way to clean out your fridge.  These call for around 6 eggs with milk in a pan that can then be placed in a hot oven to cook through (see frittata recipe on my garlic blog).


Friday, September 21, 2012

Basil Basics – September 21, 2012


I grow basil every year and I especially like to grow the purple kind.  It doesn’t taste any different, but it is really pretty on pizza, tarts and salads.  My favorite is orange salad,but we often make Caprese salad as well when we have lots of tomatoes.  Here are both simple, fresh recipes:

Caprese Salad

Sliced fresh tomatoes
Sliced fresh mozzarella
Basil leaves
Extra Virgin Olive Oil

Layer the first three ingredients.  Drizzle olive oil on top with a little salt and enjoy.


Orange and Basil Salad

Navel oranges separated in sections
Fresh basil leaves (looks great with purple basil)
Red onion or radish rings

Dressing #1 -
Olive Oil
Pinch sugar
Salt and pepper

Dressing #2 –
1 T. Balsamic Vinegar
1 T. Red Wine Vinegar
1 tsp. Lime Juice
1 T. Olive Oil
1 tsp. Sugar
1 tsp. Red Pepper Flakes
Salt and Pepper

Mix and enjoy!

The great thing about basil is that the more you use it, the more it produces, so even if you aren’t using it, pinch off the flowers as they develop so new leaves start.  Most years, I cut back at least one plant and bring it in for the winter before replanting in the Spring, but basil is easy to find as small plants in the Farmer’s Market and can be grown from seed if you start early enough.

I also store basil by pulling off the leaves and keeping them in a zip lock bag in my freezer during the winter.  If you prefer, you can make pesto and pour into ice cube trays.  Then, just pop these cubes into a zip lock bag and defrost as you need for recipes.

My friend Becki Winchel also has a great use for basil I had never heard of before.  You steep the leaves in boiling water like a tea.  Then, when cooled, put in a spray bottle and spray around your kitchen for a safe way to keep fruit flies from gathering.  I have to try this because we are eat up with fruit flies this year!!!!

Saturday, September 15, 2012

Growing and Harvesting Mushrooms – September 15, 2012


John and I are members of the Billy Goat Hill Garden here in Louisville.  In addition to our bed with tomatoes, okra and cucumbers, I volunteered to help with the community garden mushroom garden.  Limbwalker Tree Service donated several large sections of hardwood for our cause that we stacked in a cool tree-covered area.  You simply buy plugs of shiitake mushroom spores.  They look like large pills.  You drill into the hardwood and insert a plug in each hole (we did 100) and then you coat the top of each hole with heated food grade wax (I saved some from a cheese purchase and heated with our little propane torch used to warm the top of cream brulee) to keep bugs out.  Then comes the hard part – you wait a year for the shiitakes to grow. 


I have an advantage though in that a group of boy scouts planted mushrooms 4-5 years ago and although we thought they were dead, (each log will stop producing mushrooms in about 5 years as the log completely dies and provides no nutrition for the mushroom spores) mushrooms appeared everywhere after the big rain following Labor Day.


I used my mushroom harvest in a new recipe for winter squash.  I have been interested in learning more about Moroccan cooking and these are two recipes that used local harvest and were delicious to boot:


Moroccan winter squash

1 T. butter
1 T. olive oil
1 diced onion
4 minced cloves garlic
2 tsp. ground cumin
1 cinnamon stick
Salt and pepper to taste
1 pound butternut squash, large dice
3/4 pound red potatoes, large dice (or do with all squash and no potatoes)
2 cups broth
2 cups caned chickpeas, drained
1 (14-ounce) can diced tomatoes, with juices
Several Shiitakes in large slices
Pinch saffron threads

Heat butter and olive oil in a heavy-bottomed saucepan over medium heat.  Add onion, garlic, cumin, and cinnamon, and season with salt and freshly ground black pepper. Cook, stirring occasionally, 5 minutes.  Add squash and potatoes, season with salt and freshly ground black pepper, stir to coat, and cook until just tender, about 3 minutes.  Add broth, chickpeas, tomatoes and their juices, mushrooms and saffron.  Bring mixture to a boil then reduce to low. Cover and simmer until squash is fork tender, about 10 minutes.

Remove from heat and if you choose, stir in preserved lemon and olives. Serve over couscous garnished with cilantro, almonds, and yogurt.


Moroccan Eggplant with Garbanzo Beans

1 onion, sliced thin
5 cloves garlic, minced
1 T. olive oil (or can use broth)
1 red bell pepper cut in small pieces
1 eggplant cut in 1 inch pieces
Pinch of red pepper flakes
2 tsp. turmeric
1/2 tsp. garam masala
1 tsp. cumin
1 tsp. paprika
1 15 oz. can garbanzo beans, drained
1 1/2 c. lentils, soaked and drained
1 large tomato, chopped with juices reserved
1 1/4 c. broth
1/2 c. raisins
Salt and black pepper to taste
Can garnish with chopped parsley or cilantro

Heat oil in heavy bottomed pan on medium.  Sauté onions for 5 minutes.  Add garlic, bell pepper, eggplant and spices and mix together for one minute.  Add broth and tomatoes and stir, cover and cook 10 minutes.  Add beans and lentils and cook another 5 minutes.  Add raisins and cook final 5 minutes or until consistency is correct.  Season with salt and pepper and garnish with fresh herbs.

This meal is very healthy with high concentrations of molybdenum, vitamin C, manganese and fiber.  You can serve as a side or it makes a great vegetarian meal with bread.

One thing I learned about mushrooms through our harvesting is that they are very susceptible to water content.  When I first picked them, they were very dry and I was afraid not good for cooking.  The second harvest was right after a rain and they were too wet.  I found the best way to deal with this was to store them in the refrigerator in a plastic bag wrapped in paper towels.  A dry paper towel helped soak up the extra water with the wet mushrooms and a wet towel helped the dry mushrooms come back to life. However, if you want to store the mushrooms for longer than a week, drying them is a great method.  You can use a food dehydrator or allow to dry in the oven at low.  Keep these in a cool, dark place until you are ready to use in recipes.  They are great in soups and stir frys.

Sunday, September 9, 2012

Beets Just Can’t be Beat – September 9, 2012

My motto about gardening is that the real purpose is always to grow tomatoes.  This still holds true, but there are a few other things that are really worth a gardening investment because they are better if you grow your own.  One of these is beets.  

I know many people think they do not like beets because they tried and disliked pickled beets or could never get past the red dye they make.  But cooking beets makes them sweet like carrots and you can plant varieties that are not red (we grew Chioggia this year which has a bulls-eye appearance when cut in half and you can also get yellow, pink and white) to avoid the dye.  I especially like beets tossed into stir fry but use the non-red ones then to avoid a dinner that looks like a murder scene.   


Our garden tends to be too rich in nitrogen which is not good for beet growth, but it makes great beet greens.  And this is why I think growing your own beets it worth the effort.  We pick the greens from our beets all summer to add to salads like lettuces or to make wilted salads with bacon like dandelion greens.  


Sautéd Baby Beet Greens

1 sliced garlic clove
1 tsp. olive oil
8 cups fresh beet greens
salt and pepper

Sauté garlic in large skillet on high for 30 seconds.  Add beet greens and sauté 2-3 minutes until wilted.  Season with salt and pepper.

With red beets, I love nothing better than to just bake them and eat with a little salt and/or goat cheese.  You can also add a simple vinaigrette and eat while warm or cold.


Baked Beets

Fresh beet roots
Salt

Preheat oven to 350 degrees.  Wrap eat beet root in foil to cover and bake in oven until a fork can pierce easily (about an hour).  Remove beet roots from wrap and remove the peel (this will dye your fingers briefly in case you want to use gloves - I should also warn those who have never eaten lots of beets that you’ll see the dye later in the bathroom, so don’t worry).  Chop or slice, sprinkle with salt and enjoy!
Once you’ve enjoyed the sweet taste of fresh beets, try adding goat cheese while they are still warm and/or your favorite vinaigrette, a bit of orange or lemon juice and/or fresh sweet onions.  

Finally, you can always go the traditionally route of pickling beets.  We did put up one jar this year but instead of the traditional pickled beet recipe, we used a sour pickling recipe from Southern Living and pickled everything from okra, to beets, to carrots and even whole baby squash.  It’s a simple way to put up a little of several things from your garden and you can keep extra brine in your fridge to use as you harvest and pickle over a week or so.


Pickled Veggies (great for a Bloody Mary Bar)

4 ½ lbs. veggies, washed
8 c. apple cider vinegar
1 c. water
½ c. salt
1 clove garlic per pint jar
1 small red hot pepper per pint jar
1 tsp. dill seeds per pint jar
1 tsp. mustard seeds per pint jar

Bring vinegar,water and salt to boil.  Meanwhile, pack vegetables into jars (some facing up and some down) and add garlic, pepper and seeds to each jar.  Pour brine to fill each jar to ½ inch from top and seal.  Boil okra 10 minutes in jars and other vegetables 15 minutes.